Basically Contact Form widget will give your visitors and readers a medium to contact you easily. Blogger doesn't supports plugins like wordpress so it becomes very hectic job to find a better looking and better working contact widget for your blog.
There are a lot of third party widgets available but most of them are premium or very limited to access, But if you use blogger's default one, it becomes easy to manage messages you will receive through this widget as it will forward the message to your same email id which you are using to access the blog.
Follow the steps given below to add a contact us gadget on your blog.
Go to blogger.com and log in to your account. If you are running multiple blogs, you need to choose the desired blog from the list from your blogger dashboard.

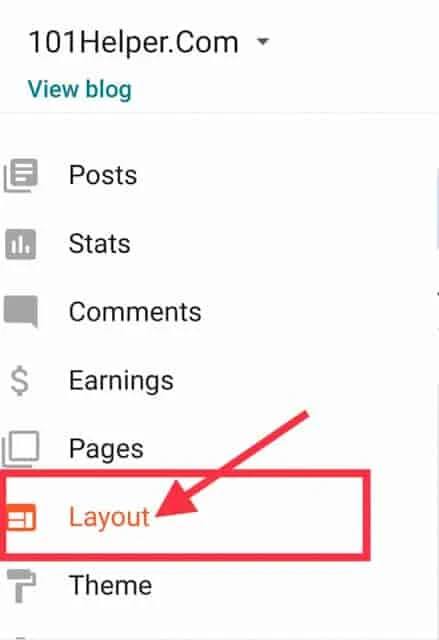
Click on Layout from the left sidebar to get an option to add gadgets.

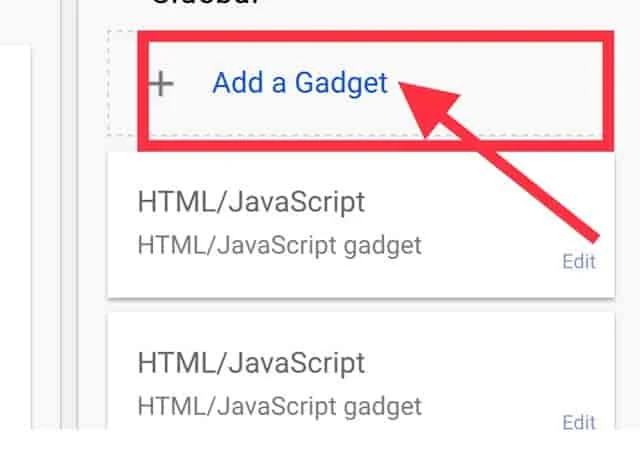
You can see an Add a Gadget link on the main panel on the right side. Clicking on it will bring you to a list of gadgets.

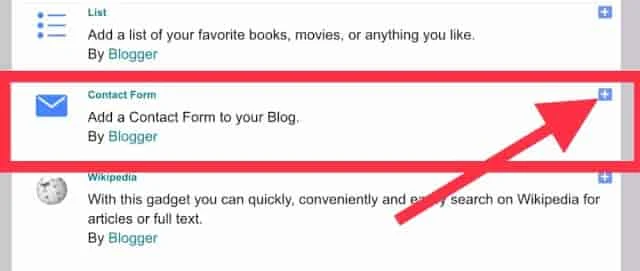
There are more gadgets. Now, you will see Contact Form. Just add the same to add Contact Form Widget. Then, you will see popup.

Click on the Save Button to save Contact Form Widget.
Next, please open Template Dashboard > Theme > Edit HTML > apply the code below before </style> or ]]></b:skin>.
Then, Save Template.
There are a lot of third party widgets available but most of them are premium or very limited to access, But if you use blogger's default one, it becomes easy to manage messages you will receive through this widget as it will forward the message to your same email id which you are using to access the blog.
Create Contact Us Widget On Blogger’s Blogspot Website
Follow the steps given below to add a contact us gadget on your blog.
Go to blogger.com and log in to your account. If you are running multiple blogs, you need to choose the desired blog from the list from your blogger dashboard.

Click on Layout from the left sidebar to get an option to add gadgets.

You can see an Add a Gadget link on the main panel on the right side. Clicking on it will bring you to a list of gadgets.

There are more gadgets. Now, you will see Contact Form. Just add the same to add Contact Form Widget. Then, you will see popup.

Click on the Save Button to save Contact Form Widget.
Next, please open Template Dashboard > Theme > Edit HTML > apply the code below before </style> or ]]></b:skin>.
/* Contact Form */
#ContactForm1_contact-form-widget {
    max-width:100% !important
}
#ContactForm1_contact-form-name, #ContactForm1_contact-form-email, #ContactForm1_contact-form-email-message {
    background-color:#FFF;
    border:1px solid #eee;
    border-radius:3px;
    padding:10px;
    margin-bottom:10px !important;
    max-width:100% !important
}
#ContactForm1_contact-form-name {
    width:47.7%;
    height:50px
}
#ContactForm1_contact-form-email {
    width:49.7%;
    height:50px
}
#ContactForm1_contact-form-email-message {
    height:150px
}
#ContactForm1_contact-form-button-submit {
    max-width:100%;
    width:100%;
    z-index:0;
    margin:4px 0 0;
    padding:10px !important;
    text-align:center;
    cursor:pointer;
    background:#27ae60;
    border:0;
    height:auto;
    -webkit-border-radius:2px;
    -moz-border-radius:2px;
    -ms-border-radius:2px;
    -o-border-radius:2px;
    border-radius:2px;
    text-transform:uppercase;
    -webkit-transition:all .2s ease-out;
    -moz-transition:all .2s ease-out;
    -o-transition:all .2s ease-out;
    -ms-transition:all .2s ease-out;
    transition:all .2s ease-out;
    color:#FFF
}
#ContactForm1_contact-form-button-submit:hover {
    background:#2c3e50
}
#ContactForm1_contact-form-email:focus, #ContactForm1_contact-form-name:focus, #ContactForm1_contact-form-email-message:focus {
    box-shadow:none !important
}
@media screen and (max-width:640px) {
#ContactForm1_contact-form-name, #ContactForm1_contact-form-email {
    width:100%;
}}
Then, Save Template.
