Adsense account is very important for both blogger and YouTube users. Because AdSense is our only source of income. Apart from Adsense, we can also earn money from Affiliate Marketing but Adsense is best for blogs and youtubers. There are many sites that allow us to display ads. But AdSense pays the most. Read this post to know more about how to create an AdSense account.

What do you want to do to create an Adsense account?
First you have to follow Adsense rules. If you don't follow the AdSense account rules, your AdSense account may be blocked.
Remember, you can only create one AdSense account. Because Google Adsense doesn't allow to create more than one AdSense account.
- Email (Gmail) Account
- A Website/Blog or Youtube Account
You can create account with Website/Blog or Youtube Account. Here this post will tell you all the information about Website/Blog or Youtube Account.
If you already have a Gmail account then this is a good idea or if you don't have a Gmail account then first create your Gmail account. Click here to get information about how to create Gmail account on Google. If you have not created your blog yet, then create your blog first. click here to know about how to create a blogspot blog on blogger. If you have blog and created some posts then, Visitors will come to visit your blog. You can earn money showing ads them through adsense ad, that's why you must have connect your blog to google adsense account. If you haven't connected your blog with Adsense, here's the article how to do it today.
To create an Adsense account, your site must have at least 300 pageviews per day. If you try to create an AdSense account with low traffic, your AdSense account will not work. So please increase the traffic of your blog first
How to Create Google Adsense Account Step By Step - Full Guide
To create an AdSense account, you just have to follow some easy steps. But keep in mind that don't enter the wrong address in the Adsense account. Enter your correct address or correct details. With which you will not have any problem in future.
Ready to join AdSense? You need these two things to create an AdSense account:- A Google Account: If you're using Gmail or any other Google service, you already have one. If not, you can create a Google Account when you create your AdSense account.
- Your own content created website, blog, youtube channel or other original content, as long as you're the owner and it complies with the AdSense Program policies.
How to create your account?
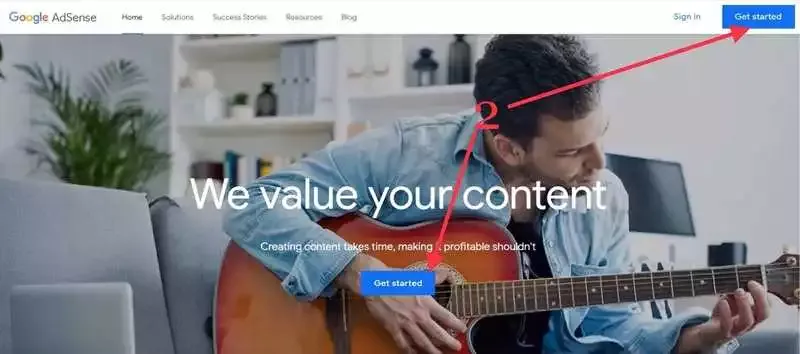
- Visit https://www.google.com/adsense/start.
- Click Get started.
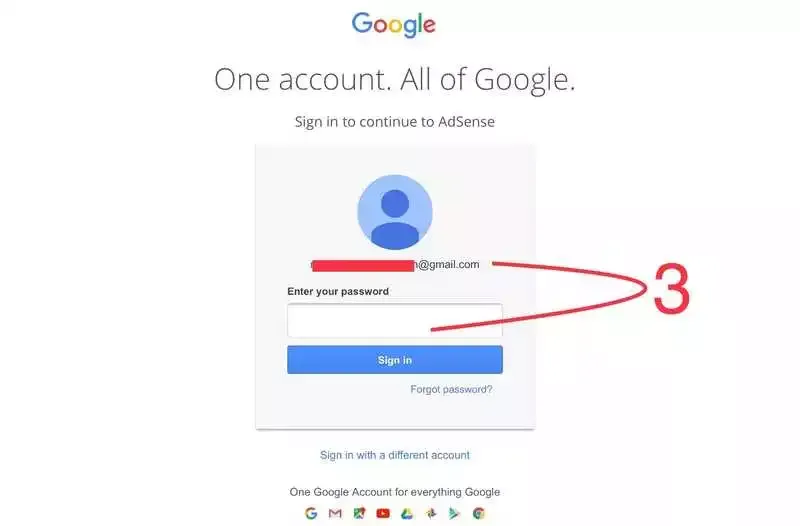
- Sign in to your Google Account.
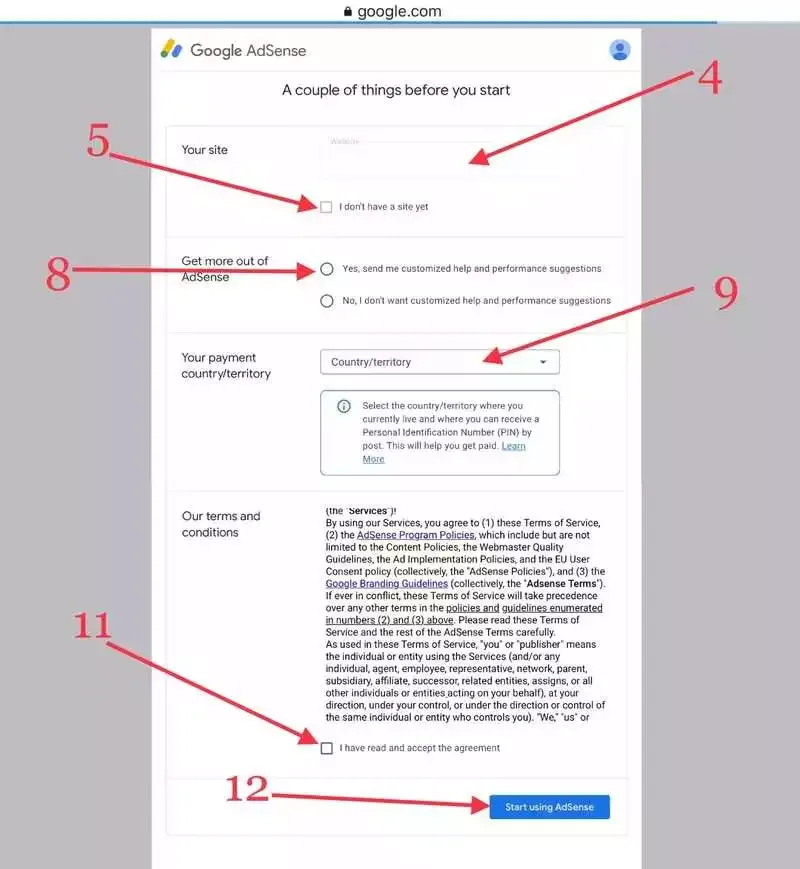
- Enter the URL of the website or blogger blog that you want to show ads on. Learn more about how to enter your URL.
- If you don't have your own website/blogger blog or If you want to add your site later, leave this field empty and select I don't have a site yet.
- If your site is on one of google host partner sites (e.g., Blogger), click Go to… after you enter your URL. Google'll be able to set you up faster that way because host partner sites follow a different account creation process.
- Choose whether you'd like AdSense to send you customized help and performance suggestions.
- We recommend that you choose Yes so google can help you get more out of AdSense. You can change your contact settings later.
- Select your payment country or territory. In this feild, enter all the information is correct because a mail arrives at your address, it will contain your address verification codes, which you have to verify your address by entering the code on your Google Adsense Account. You will get the payment once the address is verified.
- Review and accept the AdSense Terms and Conditions.
- Click Start using AdSense.
- You're now signed in to your new AdSense account. Now setup your Payment profile
- Select Google Adsense Account type what you are creating Adsense account for. If you are creating Adsense account for Individual blog then select "Individual". If you are creating Adsense for Business Select Business
- Here you have to fill your full name. You can fill whatever you want. They keep their real name better. Because Google Adsense will ask you for Identity Verification.
- Enter your correct address here. Keep in mind that this is the correct filling. I have told you this before.
- Enter the correct name of your city, your state, Enter your Postal code. (Postal code you have to enter postal code where do you live, if you do not know then ask someone to know)
- Enter your mobile number. (*If your number is not verified, then as soon as you click on the number, enter your own mobile number. then, Verify. You can choose any option either message or voice call to verify the number. Now you have to choose one.) you will receive Message or a call in the mobile number that you have entered then, you will have to verify, entering the verificarion code.
- Now check your all information once so that there is no wrong. After filling everything correctly, click on the Submit My Application button.


Your Google Adsense Account has been created. Now all you have to do is to get the Adsense account approved. It will be done when a message will come from your Adsense account on your Gmail ID. It may also take 2-5 days.
You can now explore your new AdSense account. You might notice that some features are grayed out. That's because there are a few tasks that you need to complete before google can fully activate your account.
